Sunday, November 15, 2009
first floor and framing
Once the box beams are built, you can start the first floor decking. The decking is 2x6 tongue and groove. Spacing of the beams is critical for window/door openings and stair layout.
Once the floor is down you notch out the ends of the beams, to accept your goal posts.
With the floors notched out, we built our posts. The post's are made of three 2x4's. The post's have a central 2x4 that runs from the sill plate, through both box beams, and into the rafter. Four more 2x4's are cut and nalied to the central 2x4. Two represent the first floor, floor to ceiling height. Two more, for the second floor side walls. The second floor 2x4's are installed after the second floor deck, and create tenon for the roof rafters.
Once the post is made, you slide them into the box beam, and you have a goal post.
The goal post is then lifted and placed into the notched out, first floor box beams.
Labels:
First floor deack and framing
building box beams
This is all of our wood, or most of it.
The floors are made of box beams.
The box beams are made of two 2x10's and one 2x4. The 2x4 is sandwhiched between the two 2x10's and is 3.5" shorter on the sides.
A fair amount of the work is just looking and cutting down the 2x10's.
While a seemingly simple tasks, keeping the beams square and true is not easy.
The floors are made of box beams.
The box beams are made of two 2x10's and one 2x4. The 2x4 is sandwhiched between the two 2x10's and is 3.5" shorter on the sides.
A fair amount of the work is just looking and cutting down the 2x10's.
While a seemingly simple tasks, keeping the beams square and true is not easy.
Friday, July 17, 2009
First delivery of our house.
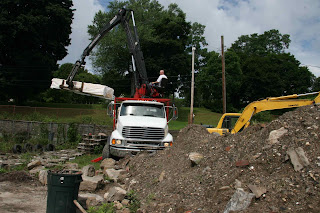
The truck with our first delivery is finally here! It was a tight fit but the boom truck pushed his way in. The question of the day. Where to put all this stuff.
Everyone in the neighborhood seems confused. "I thought your house was coming today." "It's there in the yard" I say, but still they can't wrap their heads around the idea of me building a house. Again they ask, "but what's all that shiny stuff for?" "It's the insulation" I say. "For what?", they ask. "For the house" I say again. "My gosh, you are actually building it with your hands!. I think we learned something about folks doing that in grade school."
Yes, that's our house, piles of wood, insulation and pieces of grey metal (for the roof)
The Heating system
Foundation!
It took a day or two to set up the forms, but only 45 minutes to an hour to fill them with concrete. After a day the forms are striped of and the walls revealed. Then a layer of plastic, insulation, wire mesh, and the tubing for the heat was prepared, before they poured the slab. We also waterproofed the outside walls with a blue liquid rubber and two inch's of foam insulation, from the footings up to the top of the wall.
Subscribe to:
Posts (Atom)